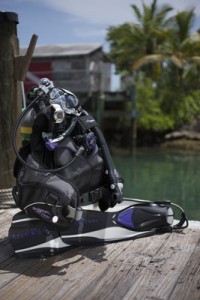
Although all dive gear is an investment, your Buoyancy Compensator is one of the most important pieces of dive gear you will ever own. It is what allows you to ascend, descend and maintaining neutral buoyancy at depth during every dive. As such, not only is it important for you to take good care of it so that it will stay in excellent working order, but for you to get the most of your money by making your BCD work for you for many years.
Properly cleaning your BCD is a little more involved then just rinsing it in the shower at the beach or on the boat post-dive. Your BCD needs to be cleaned thoroughly after every use. We say "use" here because it is not only salt water that can damage your BCD. Of course, letting the salt water dry on your BCD will not only leave salt crystals on the material which can be very abrasive and lead to damage, but the microorganisms and bacteria in the seawater will result in your BCD smelling funky. Aside from ocean diving, your BCD needs to be rinsed after fresh water diving just as much to remove all silt and sand from the BCD. Not cleaning off silt and sand which will cause the same abrasion problems the salt water will. Rinsing is importing even after all pool dives to remove chlorine from the BCD which leads to fading and deterioration of the BCD material.
We understand that most divers don't love taking the time to clean their gear, but if you spend just a couple of extra minutes following these simple steps your BCD will thank you for it.
Step 1: Thoroughly rinse the BCD
Here we want you to rinse the outside of your BCD thoroughly, especially between all of the folds, pockets, buckles and velcro. Your best options here are to run a hose over the entire BCD for a few minutes, spraying all over, or dunking it in a freshly filled rinse bucket. (We say "freshly" filled because rinse buckets that sit out all day for all divers to use without being emptied and re-filled will eventually become full of the same salt or silt from other people's gear that you are trying to get OFF of yours).
Step 2: Work the buttons
While your BCD is in the rinse tub, or while you are running water continuously over it, work all of your BCD's buttons such as the inflator and deflator buttons, front and rear dump valves, and any other valves or buttons you may have on your BCD.
Step 3: Rinse the hose
This step is best done with running water from a hose. While pressing the deflator button on your BCD, run fresh water into your inflator hose, down the hose and into the bladder inside your BCD. If you don't press the deflator button, it will not open up the valve to allow water to run through the hose and into your BCD bladder.
Step 4: Rinse the inside bladder
Rinsing the inside of the bladder is probably THE most important step in cleaning your BCD but the most skipped. During every dive, water enters your BCD bladder, usually when we try dumping air when our BCD is already empty. This water needs to be rinsed out before being allowed to dry on the inside walls of the bladder. First, dump any remaining water from the dive out by holding the BCD upside down, depressing the deflator button and draining. Then fill the bladder by following step 3 above, swish the water around and dump it out again. Repeat this step 3-4 times.
Step 5: Inflate and dry
The last step is to orally inflate your BCD and hange it up to dry in a cool, SHADED area, preferably on a BCD hanger.
By following these simple steps you can rest assured that your BCD will be completely rinsed and ready to store for your next dive.


